Search This Blog

Tuesday, August 7, 2012

Mojo Monday 253 - Card 3

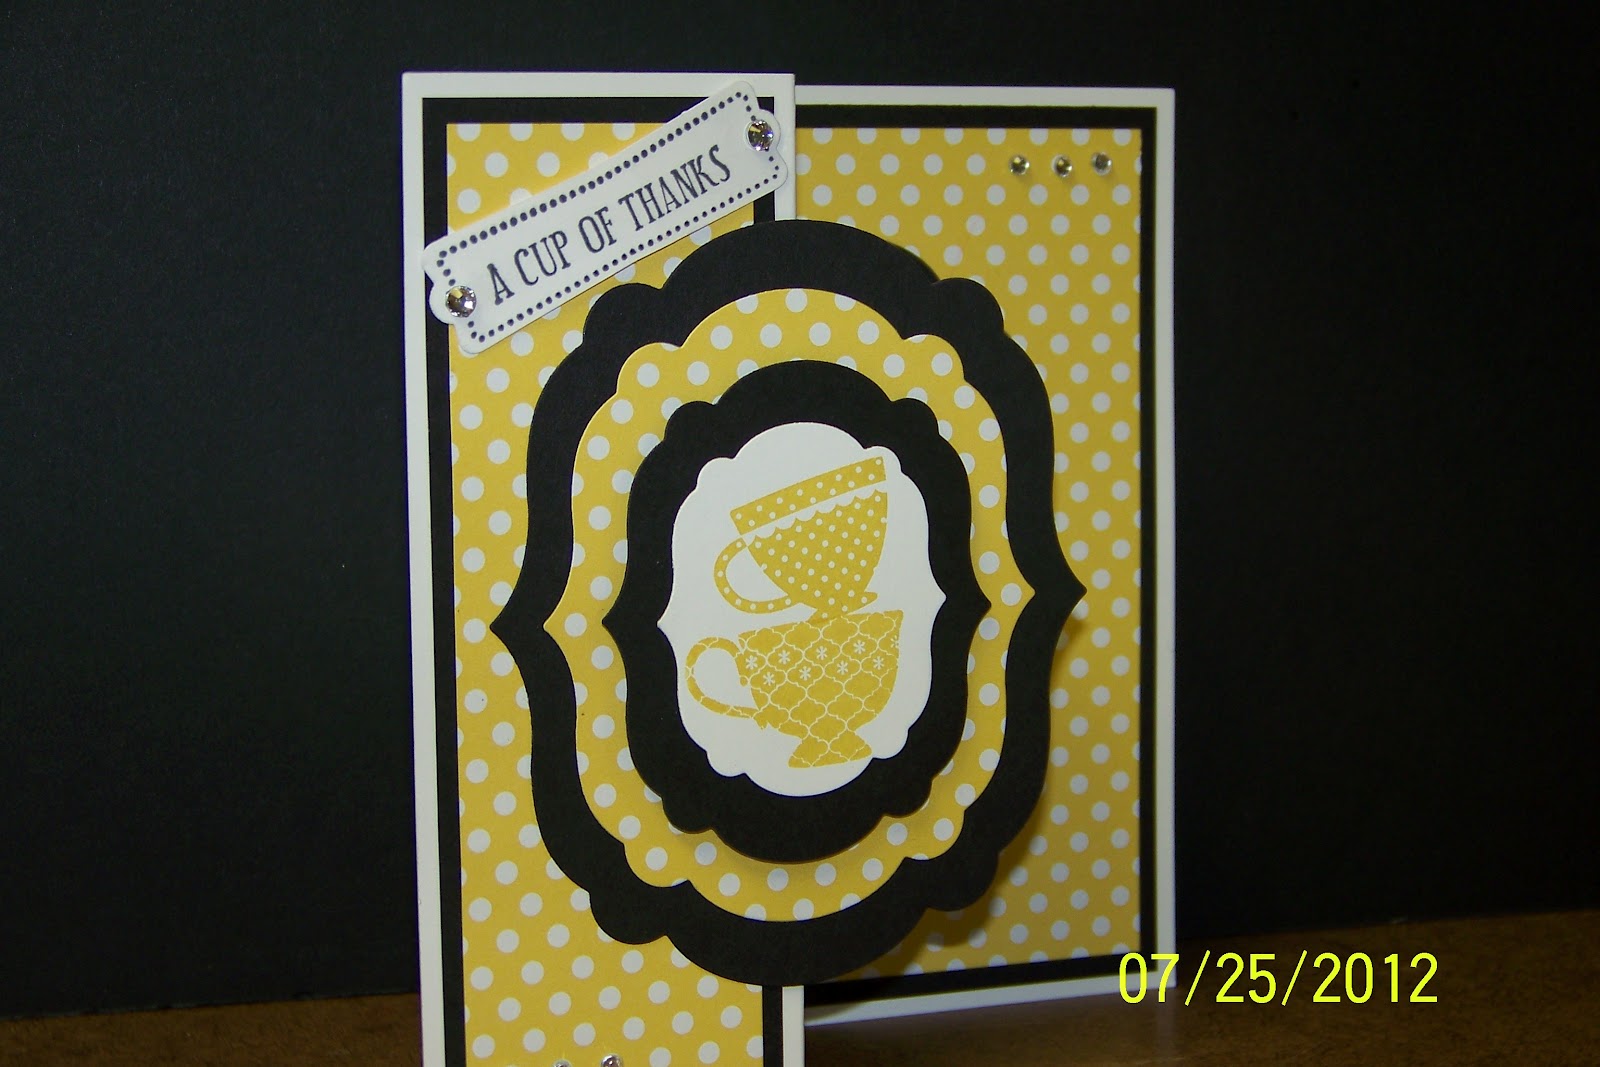
Here is the 3rd card I made for Mojo Monday's Challenge. This is a 1/2 card, made by folding a standard 8-1/2" x 11" piece of card stock in half. I wanted the cut image to stand out a little more and show off the detail. 
Yep! It's a Halloween Card! I love the Fall and Halloween! It's been so uncomfortably hot this summer here in Wisconsin that I've been making Fall & Winter themed cards to get my mind off of the heat. I just can't wait for Fall to come!
Recipe:
  1. Wacky Wishes Stamp Set
  2. Basic Black Classic Stamp Pad
  3. Whisper White & Basic Black CS
  4. Orange & Black Glitter Paper from Hobby Lobby
  5. Frightful Sight DSP (retired)
  6. Basic Black Raven Ribbon (retired)
  7. Ultimate Creative Series & Elegant Edges Cricut Cartridges
  8. Black Brads from the Neutrals Collection
  9. Basic Grey Stampin' Marker
You really have to see this card in person to appreciate it. I love it! The mummy is so stinkin' cute!
 Thanks for stopping by!
Hugs,
Ginger.

Mojo Monday 253 - Card 2

For this card I decided to use my Cricut. I just love playing with my E2. I didn't use my Gypsy today as I need to familiarize myself with my E2 a little more.
The cut on the car is very small as this is a standard A2 size card, which made it a little difficult to get the details I wanted from it. I cut the car at 1-1/2". Here is the recipe for this card...

  • Itty Bitty Banners Stamp Set
  • Bitty Banners Framelits
  • Whisper White & Chocolate Chip CS
  • Its A Boy Echo Park Paper Pack
  • Light Blue Satin Ribbon
  • Elegant Edges, George and Basic Shapes & Nate's ABC Cricut cartridges
  • Basic Black Classic Stampin' Pad
I adore Nate's ABC cartridge. It has so many cute images. It is very cute!
Hope you like it. Thanks for stopping by!
Hugs,
Ginger :)

Mojo Monday 253 Challenge - Card 1

Hello Paper Crafters! 
This week's Mojo Monday 253 is a challenge week so I decided to make a card. I ended up making 3 cards with the same layout because I thought the layout was so cute. Here is card #1. 
This is my Stampin' UP! card for this challenge. I was trying to make a masculine 
birthday card and I think it turned out pretty nice. I just LOVE the Road to Happiness stamp set! It is so cute!
Recipe:
  • Road To Happiness & Itty Bitty Banners stamp sets
  • Whisper White, Chocolate Chip & Baja Breeze CS
  • International Bazaar DSP
  • Chocolate Chip, Pacific Point, Tangerine Tango, Baja Breeze & Lucky Limeade stampin' ink
  • Banners Framelits
  • 2-3/8" Scalloped Circle & 1-3/4" Circle Punches
  • Fancy Fan EF
  • Chocolate Chip Polka Dot Scalloped Ribbon
 Hope you like it! Now on to writing the next post for card #2. Happy Crafting.
Hugs,
Ginger.

Friday, July 27, 2012

My Thank You Card to Sue

I am sooo excited that I have another talented lady who is going to be joining my Stampin' UP! team! Hooray!
Her name is Sue Eichman and she is a very talented & crafty lady!
Here is the card I decided to make for her.....
I copied the same design I used in previous posts from a CardzTv card I had cased. I just love this layout.

I really wish I had a better camera so you could enjoy the entire beauty of this card. I love it!

Recipe:
  • Tea Shoppe stamp set
  • Polka Dot Parade DSP
  • Whisper White, Basic Black & Daffodil Delight CS
  • Basic Black & Daffodil Delight Ink
  • Labels Collection Framelits
  • 1-1/4" Circle Punch
  • 1-3/4" Scalloped Circle Punch
  • Modern Label Punch
  • Basic Jewels
  • Stampin' Dimensionals
 A "BIG WELCOME!" to Miss Sue & a "BIG THANK YOU!" to you for stopping by!
Happy Stamping.
Hugs,
Ginger <3

Thursday, July 26, 2012

Christmas In July - July Club Card 3

For our 3rd card this month, I decided to create a Christmas card.


This card is made using the Mojo Monday sketch #249 for the layout. I really love the great ideas they come up with on their site for card design.
Supplies used:
  • Petite Pairs & Greeting Card Kids Stamp Sets
  • Whisper White, Basic Black & Cherry Cobbler CS
  • Be Of Good Cheer DSP
  • Jet Black Staz-On Ink Pad
  • Cherry Cobbler, Gumball Green & Daffodil Delight Stampin' Markers
  • Dazzling Details & Cherry Cobbler Dazzling Details
  • Cherry Cobbler Baker's Twine
  • Gumball Green 3/8" Stitched Satin Ribbon
  • Regals Designer Buttons
  • Stampin' Dimensionals

 During class I decided to color her outfit in Gumball Green. It's cute, but I like the Cherry Cobbler for her outfit better.

Hope you enjoyed the cards I created for club this month. Thanks for stopping by!
Hugs,
Ginger <3.

Wednesday, July 25, 2012

CARDZTV Christmas In July Challenge 2 - Merry Christmas Snowman

Today I've decided to enter Mary's Christmas In July Challenge using Mojo Monday sketch #251. How's this for killing 2 birds with one stone!
I love how this card turned out.
Supplies Used:
  1. Stampin' UP! & DCWV Card Stock
  2. Colorbok Patterned Paper & Stampin' UP! Red Glimmer Paper
  3. Doodlecharms, Designers Calendar & Potpourri Basket Cricut Cartridges
  4. Stampin' UP! Neutrals 3/16" Brads
  5. Stampin' UP! Basic Jewels
  6. Stampin' UP! Petite Pairs Stamp Set
  7. Stampin' UP! Classic Black Ink Pad
  8. Studio G Glitter Glue
  9. Tangerine Tango Stampin' Marker from Stampin' UP!


 Hope you like it! Happy Stamping!

Hugs,
Ginger <3

July Club Card #2 -Papillon Potpourri -MOJO246

Club was a lot of fun this month! It is always good to see my dear friends and spend time stamping with them. What else does a girl need?!

On my last post I showed you the dresser card we created. Today I am going to show you a butterfly card I designed using Mojo Mondays 246 design layout. 

Supplies Used:
  • Papillon Potpourri & Occasions Alphabet Stamp Sets
  • Whisper White, Daffodil Delight, Baja Breeze, Rich Razzleberry & Basic Black CS
  • Floral District DSP
  • Basic Black Classic Stampin' Pad
  • 3/4", 1", 1-1/4" & 1-3/8" Square Punches
  • Elegant Butterfly Punch
  • Daffodil Delight 1/4" Stitched Grossgrain Ribbon
  • Mini Glue Dots

During class, I stamped the butterflies with one of the other patterns in the set and changed the order of the colors. 


I just love how this new punch from Stampin' UP! cuts out the butterflies perfectly for you! It coordinates beautifully with the Papillon Potpourri stamp set.
It even trims this butterfly without a "white line" around the image! How stinkin' cute is this!
Thanks for stopping by!
Hugs,
Ginger <3.

Monday, July 23, 2012

Dresser Cards

One of my club members has been asking me to show them how to make a dresser card for some time now, and I finally fit it into our club. This is the dresser card that I taught them.
Supplies used: (Please note all supplies I use are Stampin' UP! unless otherwise stated)
  • Petite Pairs Stamp Set
  • Sahara Sand, Perfect Plum, Early Espresso & Whisper White CS
  • Subtles Collection DSP
  • Early Espresso & Perfect Plum Classic Stampin' Pads
  • Curly Label, Full Heart & 2-1/2" Scalloped Circle Punches
  • Essentials Paper-Piercing Pack
  • Stampin' Pierce Mat
  • Paper-Piercing Tool
  • Simply Scored Scoring Tool
  • Stampin' Trimmer
  • Perfect Plum 3/8" Taffeta Ribbon
  • Victoria 5/8" Crochet Trim
  • Large Pearl Basic Jewels
  • Sticky Strip
  • Stampin' Dimensionals
  • Stampin' Sponge


During class, I flipped my DSP around to see what the other side would look like for the drawers of the dresser.

Which one do you prefer? I can't make up my mind. Here are a few other dresser cards that I made while tossing the idea around.

Hope you like them. Thanks for stopping by!


Hugs,
Ginger <3.

A Horsey Side of Things.....Mounting Blocks

A few weeks ago my husband was approached by one of our customers and asked to make a "mounting block". For those of you who don't know what a mounting block is, it's a set of 2 or 3 steps that riders use to help them mount their horses.

After a little research and a lot of creativity, this is what my husband came up with....
 
The camera really does not do this justice. The color is the same for all 3 steps, but the lighting was off when I took the pics, sorry. 

Don't mind my sons toys and tv, lol. What can I say, we're crafters not photographers, lol. ;)

Our customer loved hers so much that she now has 2 and we made 4 more for good measure. If you ever find yourself in need of a mounting block, or just want a really classy piece of artwork for your home, don't hesitate to give me a shout on here, facebook, email or phone. I think these would make awesome plant stands, or maybe 2 step ones for end tables! The possibilities are endless! We can create whatever your want or need is in furniture.

Thanks for looking, 
Ginger. <3

Wednesday, July 11, 2012

Wedding Cards

A couple of months ago my friend Melodie asked me to design a wedding card as one of our club projects. I found 3 different versions on YouTube and cased all of them.I just couldn't resist as they were so stinkin' cute!
 This 1st one came from a valentine card made by vadeler. That is her YouTube channel and I believe her name is Valita. Thank you Valita!
These 2 were inspired by both vadeler and StampinJill. StampinJill (again, this is her YouTube channel) has a wonderful tutorial on how to make these embossed silk skirts! Love it! There are so many talented crafters online. I am inspired by almost every one of them!
 They all turned out so cute that I let Melodie pick which one she wanted to learn. This is the one she picked...
So that is one of the projects learned that month for club.


Thanks for stopping by!
Ginger <3